What is VIDKit?
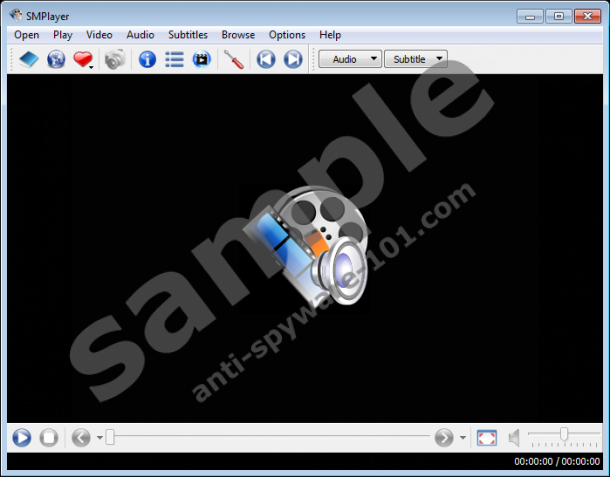
VIDKit, also known as VIDPot.tv Survival Kit, is a set of programs that is meant to make your life better. The kit supposedly includes a media player (VIDC Simple Player, SMPlayer, Media player, or some other suspicious media player), a K-Lite Basic Codec Pack, and a tool called DNS Keeper, which can be replaced by DNS Unlocker. All of these programs might seem beneficial; however, you should not trust them for several different reasons. Anti-Spyware-101.com researchers have tested this suspicious software to help you learn more about it. Please continue reading to discover what we have found, and we are sure that you will understand exactly why you need to delete VIDKit from your operating system right away. Before we jump to our findings, we want to mention the comments section right below that any user can employ to contact us and ask questions regarding the software we are discussing.
How does VIDKit work?
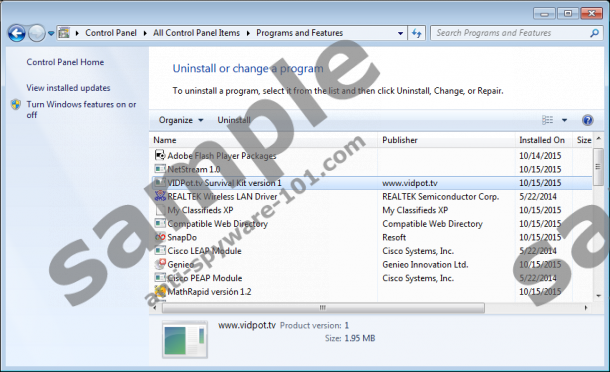
Vidpot.tv is the official source of the suspicious Survival Kit, but we have found that this potentially unwanted program (PUP) can be spread in several other ways. For example, you could acquire it packaged with other programs. You could also execute its installer when downloading a media player introduced to you via a suspicious pop-up recommendation. The worst part is that VIDKit can be installed silently, which automatically puts this tool to the list of suspicious programs. Luckily, a folder named after this program is created right on your Desktop, and it should not take long for you to discover it. Although the name of this folder is not identical to the name of the uninstaller, you might be able to make the connection. Unfortunately, the suspicious DNS Keeper is much more difficult to associate with this PUP, and it does not have an uninstaller. In fact, detecting this program is very difficult, and most users recognize its activity only after they discover ads with the tag “Ads by DNS-Keeper.” Although we are concerned about the removal of VIDKit, our main concern is this adware.
If VIDKit was installed without your permission, it might be hard to understand what is going on on your PC, as suspicious pop-up ads appear out of nowhere, and unfamiliar folders are created. While you can detect the PUP relatively easy, it might be much more difficult to understand the activity of a program capable of changing DNS settings. This unreliable program communicates with malicious DNS servers to request certain content; in this case, advertisements. These ads might be appealing; however, your interaction with them might lead you to serious security issues. Keep in mind that cyber criminals might conceal scams and malware installers behind incredibly attractive ads. On the other hand, advertisers could simply use misleading ads to boost traffic to certain websites. Whatever the case, there is no doubt that you will not benefit from this strange program running on your PC.
How to delete VIDKit
There should be no more questions about whether or not you need to remove VIDKit. Of course, you need to eliminate this infection from your operating system, and the quicker you get on with it the better. As long as this strange potentially unwanted program is running on your PC along with DNS Keeper and some fake media player, you will not be safe. Did you know that this software can update itself silently? Well, what if it uses this security backdoor to download malicious files? Needless to say, this is something you need to prevent from happening, and you can do that by eliminating unreliable software. Our removal guide explains how to uninstall undesirable software and delete the leftover components. If you choose this path, you will also need to manually delete the remaining threats. Anti-Spyware-101.com experts recommend using anti-malware software instead.
Removal Instructions
Windows 10 or Windows 8:
- Launch RUN (tap Win+R) and enter Control Panel.
- In the Programs menu click Uninstall a program.
- Right-click the undesirable application and click the Uninstall button.
Windows 7 or Windows Vista:
- Click the Windows logo on the left of the Taskbar.
- Open the Control Panel menu and move to the Uninstall a program menu.
- Right-click the program you wish to eliminate and select Uninstall.
Windows XP:
- Click the Start icon on the Taskbar and open the Control Panel menu.
- Navigate to the Add or Remove Programs menu and identify undesirable program.
- Remove all unwanted programs.
Eliminate these leftovers:
- Simultaneously tap Win+R to launch RUN.
- Enter regedit.exe and click OK.
- In the pane on the left move to HKEY_CURRENT_USER\Software\Trolltech\OrganizationDefaults\Qt Factory Cache 4.8\com.trolltech.Qt.QImageIOHandlerFactoryInterface:\C:\Program Files (x86)\.
- Right-click and Delete the key called “VIDKit.”
- Now simultaneously tap Win+E to launch Explorer.
- Enter %PROGRAMFILES(X86)% or %PROGRAMFILES% into the address bar.
- Right-click and Delete the folder called “VIDKit.”
Once you uninstall undesirable software and eliminate the remaining threats, you need to change your DNS settings back to normal, which you can do using this guide. Choose the guide created for your Windows version, and follow the steps cautiously. If you stumble upon any of these steps, start a discussion below, and we will help you overcome all issues.
How to change DNS settings
Windows 10, Windows 8, or Windows 7
- Launch RUN (Win+R), enter Control Panel, and hit OK.
- Open the Network and Internet menu and move to Network and Sharing Center.
- In the menu on the left click Change adapter settings.
- Right-click the network, select Properties, and move to the Networking tab.
- Mark Internet Protocol Version 4 (TCP/IPv4)/Internet Protocol Version 6 (TCP/IPv6) and click Properties.
- Select Obtain an IP address automatically and Obtain DNS server address automatically and click OK.
- Restart your operating system.
Windows Vista
- Simultaneously tap Win+R keys to launch the RUN dialog box.
- Enter Control Panel and click OK, and then move to the Network and Internet menu.
- Go to Network and Sharing Center and click Manage network connections.
- Right-click the network, select Properties, and click the Networking tab.
- Mark Internet Protocol Version 4 (TCP/IPv4)/Internet Protocol Version 6 (TCP/IPv6) and click Properties.
- Select Obtain an IP address automatically and Obtain DNS server address automatically and click OK.
- Restart your operating system.
Windows XP
- Click the Start icon on the Taskbar and open the Control Panel menu.
- Go to Network Connections, double-click Local Area Connection, and click Properties.
- Select Internet Protocol (TCP/IP) and click Properties again.
- Select Obtain an IP address automatically and Obtain DNS server address automatically and click OK.
- Restart your operating system.
tested removal of VIDKit*


0 Comments.