What is Jabuticaba?
Jabuticaba is an intrusive adware program that is associated with at least two other programs from the same category. The application will display localized commercial content, with the intention to generate financial profit. Some of that content could be malicious because the program does not check whether third parties embed safe links in its ads. Thus, to protect yourself from potential harm, you must remove Jabuticaba at once. What’s more, apart from displaying unreliable content, this program may also modify your DNS settings, which leads to undesirable redirections and a list of potential computer security issues. You certainly have to prevent that by dealing with this issue immediately.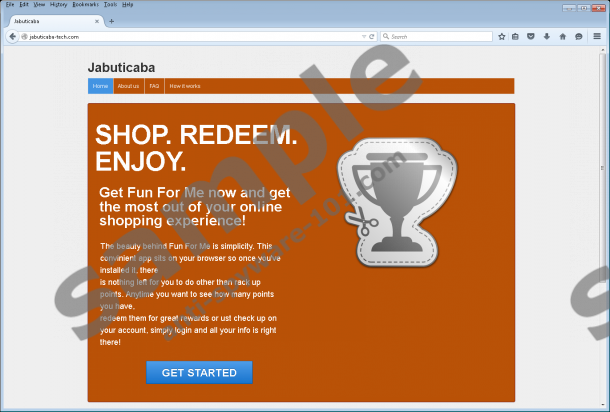

 100% FREE spyware scan and
tested removal of Jabuticaba*
Where does Jabuticaba come from?
This adware application can be downloaded from jabuticaba-tech.com. Although if you were to click the Download button you would notice that you get redirected to other adware homepages, namely V-Bates or Shopperz. Thus, we can see that Jabuticaba comes from the same family of adware applications. Our research team also says that this program is released by the same publisher as Shopperz and V-bates, so the affiliation is certain.
However, direct download is definitely not the primary distribution method because then users would not be complaining about this program. The point is that Jabuticaba also gets distributed in software packages. Even though users have to launch freeware installation themselves, often they are not aware that the third-party installers bring more than just one program, and then they need to scramble to remove different programs they neither need nor want.
What does Jabuticaba do?
As mentioned, this application is a genuine adware program, so it displays commercial advertisements whenever you access affiliated websites. In order to display those ads, Jabuticaba changes your DNS settings. You get redirected to an adware server, and all of your browsing experience is tracked to generate your online profile. This kind of tracking allows Jabuticaba to get the idea of what kind of topics interest you, and, as a result, the program then can offer you customized content.
While this customized content may look like something you have been searching for, you are strongly discouraged from clicking any of the Jabuticaba ads. In the worst case scenario, you might end up on a website that distributes malware, and it would not be surprised if you get infected with a dangerous program that causes an ultimate system crash and steals your money.
How do I remove Jabuticaba?
You have to take all the potential risks into account and delete Jabuticaba from your system at once. You will be able to uninstall this application via Control Panel (the entry in the list of programs will be either V-Bates of Shopperz), but you will also have to restore your DNS settings because you have to be sure that you do not get redirected to unreliable servers anymore.
Just because Jabuticaba says that you can save money when you shop online with it, it does not mean it is true. Please remember that most of the adware applications enter target computers to generate financial profit for their developers. This program is no exception. It does not even care whether you get redirected to dangerous sites or not. You need to take your PC’s security into your hands and safeguard the system from potential threats by acquiring a licensed antispyware tool.
Manual Jabuticaba Removal
Windows 8 & Windows 8.1
- Slide the mouse cursor to the bottom right of your screen.
- Click Settings on the Charm bar and select Control Panel.
- Go to Uninstall a program and remove V-Bates or Shopperz.
Windows Vista & Windows 7
- Press the Start button and go to Control Panel.
- Click Uninstall a program and remove V-Bates or Shopperz.
Windows XP
- Click the Start menu and navigate to Control Panel.
- Select Add or remove programs and uninstall V-Bates or Shopperz.
Restore Your DNS Settings
Windows 8 & Windows 8.1
- Move the mouse cursor to the lower right corner of your desktop.
- Click Settings on the Charm bar and open Control Panel.
- Select Network and Internet and open Network and Sharing Center.
- Click your connection type (Local Area Connection).
- Click Properties on the pop-up box.
- Highlight Internet Protocol Version 4 (TCP/IPv4) in the next box and select Properties.
- Choose the Obtain DNS server address automatically option and press OK.
- Click OK and exit the menu.
Windows Vista & Windows 7
- Open the Start menu and go to Control Panel.
- Select Network and Internet and click Network and Sharing Center.
- Click the connection type (Local Area Connection).
- Select Properties and highlight Internet Protocol Version 4 (TCP/IPv4).
- Click Properties and mark Obtain DNS Server address automatically.
- Press OK, click OK once again and exit the menu.
Windows XP
- Open the Start menu and select to Control Panel.
- Navigate to Network Connections.
- Right-click the active connection and choose Properties.
- Highlight Internet Protocol on the pop-up box.
- Select Properties and choose Obtain DNS Server automatically.
- Press OK to save changes.
100% FREE spyware scan and
tested removal of Jabuticaba*


0 Comments.