What is DnsIO?
If you keep seeing suspicious ads, it might be a sign that DnsIO was installed onto your operating system. This program can change DNS settings to inject ads into the websites you visit, despite the fact that it promises to work in a completely different manner. If you visit dnsio.net, the developers of this strange program will try to convince you that it can offer protection from malware. The creators of this website have made a huge mistake by overlooking the information they use. If they were more careful, they would have replaced the name “LookSafe.” This is another suspicious program that can change your DNS settings to show ads, and it is represented using the same information and a similar-looking website. Needless to say, both of these programs were created by the same company, which immediately gives away that they are not reliable. As you might have figured out already, we will advise you to remove DnsIO.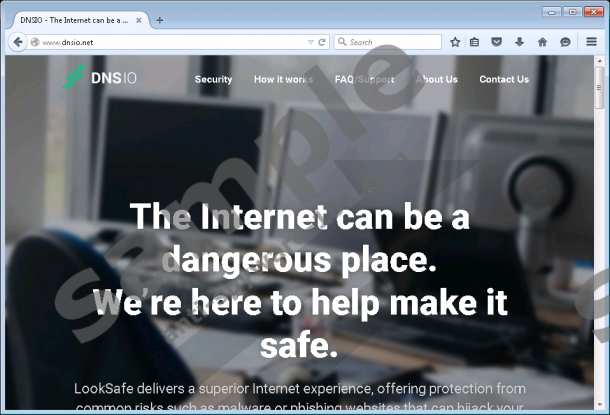
How does DnsIO work?
DnsIO is capable of changing the settings of DNS servers. Unfortunately, this potentially unwanted program (PUP) can do that silently, which is why most users have trouble finding the root of the problem. In fact, most users know little to nothing about DNS servers or their settings, and modifying them is likely to be the last thing on their minds. The problem is that if you do not change these settings, the suspicious PUP will continue having a hold over your operating system. Luckily, you now know that this is something you need to keep in mind, and our Anti-Spyware-101.com researchers can help you restore DNS settings.
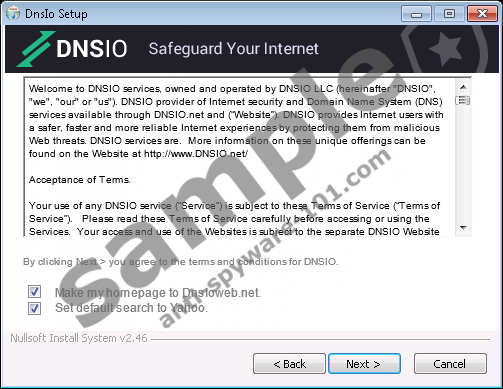
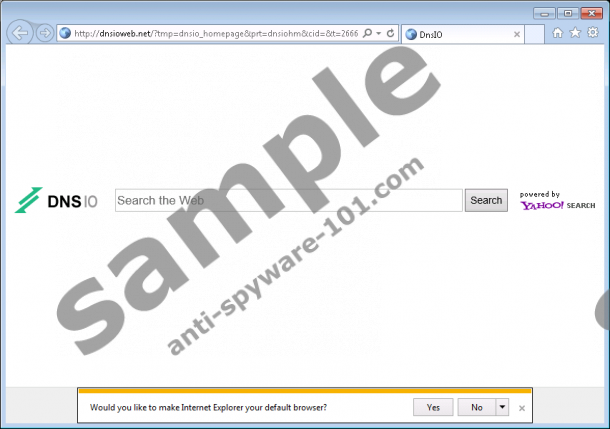
Besides changing the DNS settings, DnsIO is also known for changing search provider settings. Contrary to the common belief, this suspicious program cannot hijack browsers without the permission of their users. If the homepage on Internet Explorer and Mozilla Firefox was replaced with dnsioweb.net and the default search provider was replaced with Yahoo Search, it is most likely that you are responsible for this. During the installation of the PUP, you are likely to be provided with an option to change search provider settings, and if you do not reject the offer, the homepage and search provider tools will be replaced. Anti-Spyware-101.com researchers have also found that DnsIO can install a Firefox extension. It is likely that this extension will be employed to assists with the representation of ads, which is why you must not forget to eliminate it as well.
How to remove DnsIO
Did you know what DnsIO can be installed bundled with malicious infections? If malware enters your PC along with the potentially unwanted program, you have to do whatever it takes to delete it from your operating system. Even though the ads injected by the PUP could be malicious, other malicious programs could be even more dangerous, and they could put your virtual security at risk much quicker. Hopefully, you can still get away from this situation unscathed. First, install a security tool to delete malicious components and protect your operating system so that other infections could not slither in. Second, reset your browsers. Finally, change the DNS settings using the step-by-step instructions below.
Delete DnsIO
Remove from Internet Explorer
- Open the browser and tap Alt+T.
- Select Internet Options and click the Advanced tab.
- Click Reset.
Remove from Mozilla Firefox
- Open the browser and tap Alt+H.
- Select Troubleshooting Information.
- Click Refresh Firefox.
Remove from Google Chrome
- Open the browser and tap Alt+F.
- Select Settings and click Show Advanced settings (at the bottom of the page).
- Click Reset settings (at the bottom of the page).
Modify DNS settings
Windows 10/Windows 8.1/Windows 8, Windows 7, and Windows Vista
- Launch RUN by tapping Win+R keys on your keyboard.
- Enter Control Panel into the dialog box and click OK.
- Click Network and Sharing Center (under Network and Internet).
- Click Change adapter settings or Manage network connections (Windows Vista).
- Find the network, right-click it, select Properties, and click the General tab.
- Click Internet Protocol Version 4 (TCP/IPv4)/Internet Protocol Version 6 (TCP/IPv6) and click Properties.
- Mark Obtain an IP address automatically and Obtain DNS server address automatically and click OK.
Windows XP
- Click the Start button of the left of the Taskbar and click Control Panel.
- Double-click Network Connections and right-click the Local Area Connection.
- Select Properties, click Internet Protocol (TCP/IP), and click Properties.
- Mark Obtain an IP address automatically and Obtain DNS server address automatically and click OK.
tested removal of DnsIO*


0 Comments.